QuickBooks Refunds are inevitable for businesses. Returning the funds means deducting and balancing some transactions. However, with QuickBooks software, it’s always smooth sailing, as the refund recording features are available.
When the customer requests a refund, multiple scenarios can occur. However, your business can also require a refund from particular vendors for the wrong supply. Whatever the case, your account will be credited or debited. For proper payment recording, one must learn about categorizing refunds in QuickBooks online, as discussed in the guide.
Types of Refunds in QuickBooks
Enterprises experience various refund situations, such as:
- A customer refund for goods and services
- Tax Refund
- Refund on overpayment or credit
- Customer refund for paid invoice
- Credit card refund
- Vendor refund using credit card
- Partial Refund (customer or vendor)
Regardless of the Refund, eligible financial departments must change transactions to avoid errors.
Simple Steps for proper Customer Refund
- Through QuickBooks online page settings, proceed to the “create” tab to avail of the “check or Expenses” option.
- Open the Payee tab and choose the client you wish to refund.
- Continue and choose their bank account under the payment account details.
- Go to the “Account Receivable” from the “category column.”
- Next, provide the amount to Refund and enter other important information.
- Recheck the information and save it to close.
Linking Refund to Customer’s Credit or Overpayment on QuickBooks
- Go to the “Create” tab and pick the “Receive payment” option.
- Go for the same client used for the check or expense.
- Enter the mandatory data to open new possibilities.
- Get to the possibilities:
- Outstanding transaction
- Expense or Check options.
- Review the payment; it should be the same as the open balance.
- Again, review, save and close.
Credit Card Refund on your QuickBooks Online
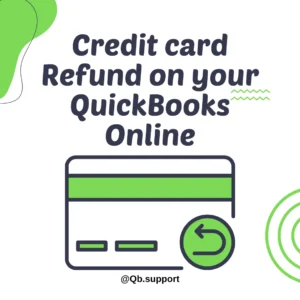
Companies receiving credit card payments from their clients can make refunds using the simple steps below:The respective individual should open the QuickBooks website link.
- Once logged in, select the “+New” option to access the “credit card credit section.
- Go to the payee section and choose the Credit card you want to refund.
- Next, click on the “expense account” where you posted the credit card charge.
- Now, record the transactions.
- One can also select the client if the first transaction had no customer data.
Refund Credit Card Payment for Sales receipts
- Open the QuickBooks page to access the “Sales Receipt” tab.
- Go to the “More” section and press the “Refund” button.
- Select the “Yes, refund my customer” option to complete the refund process.
A QuickBooks refund for items and services that don’t satisfy the customer/ Refund receipt for goods and services
- Go to QuickBooks + New tab and select the “Give a Refund/ Refund Receipt” option.
- The menu list will show. Proceed to the Refund and select the bank you wish to deposit the amount.
- Next, choose the “Return and Allowances” tab. This goes for clients who don’t return the item.
- However, clients are willing to refund the items. You need to indicate and include the goods they have returned under the “product or service” column.
How to Setup Return and Allowances for customers who don’t return the goods
Suppose a client is adamant about returning an item but has requested a Refund. Businesses should utilize the return and allowances option where the client receives a vendor’s refund check. This allows the funds to be deducted from the client’s income account, thus deducting the amount from the bank.
- The user should refer the account to:
- Detail type of discount
- The Refund and category of the income.
- Open the product and service list and set up a service.
- Next, create a name for a product or service. You can name it customer refund and allowances.
- The system will assign the items under the Return and Allowances section.
- Review the information and save the details.
- Press the close option.
Steps to record a credit memo
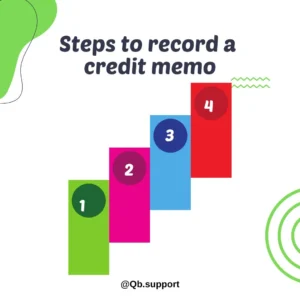
Once a client refunds a product, the agreement made between the seller and client about their balance reduction should be made in a credit memo. Businesses should make the credit memo in QuickBooks online via the steps below:
- Visit the account and settings tab from the dialogue box.
- Select the “Advanced” button from the left section.
- Next, choose the “Automation” section.
- Select the “Automatically apply credits” tab.
How to open the credit memo window
- Go to the Create menu option.
- Choose the “Credit Memo” or proceed to the “Sales Transaction” page.
- Select the “New Transaction” option to access the “Credit Memo” button.
- From the product or service selected, choose the customer you’re applying the Credit Memo.
- Key in the correct information and save the details.
Procedure to record Tax Refund in QuickBooks
QuickBooks offers an easy procedure for tax refund recording. The amount will show as a liability on your account balance.
- Navigate to QuickBooks to open different options.
- Proceed to the “Employee’s option”.
- Go to
- Payroll liabilities
- Refund of liabilities option.
- On the new page, select the “Vendor” tab to proceed.
- Choose the name of the vendor making the Refund.
- The page will show different prompts.
- Key in the refund date and proceed to the “period ending date.”
- Next, provide the date that will affect the Refund. For example, when the Refund shows on the 29th of May, the ending date should be the 30th.
- One can also choose the Refund to be conducted on your bank account balance.
Proceed with the prompts as follows:
- Name of the product
- Amount
- In the Memo section, enter a note describing the Refund received.
- The user can key in other items (if any)
- Press the “OK” button.
12. The system will balance the payments (assets and liability balance).
Conclusion
QuickBooks presents the best, most accessible, and most reliable way to record different refunds. Businesses need to implement proper recording to avoid transaction imbalance. QB’s advanced features allow for quick calculations and balance regardless of the refund type.


